
Welcome to the CompuSTAR Installation Manual. This guide provides comprehensive instructions for installing, programming, and troubleshooting CompuSTAR remote start systems. Intended for authorized technicians; professional installation recommended.
1.1. Purpose and Scope of the Manual
This manual serves as a detailed guide for installing, configuring, and troubleshooting CompuSTAR remote start systems. It provides step-by-step instructions for technicians, ensuring proper installation and functionality. The scope covers system components, safety precautions, and advanced features, while emphasizing the importance of professional installation. Designed for authorized technicians, this manual includes troubleshooting tips and programming instructions to ensure optimal performance. Always follow safety guidelines and manufacturer recommendations for a successful installation.
1.2. Safety Precautions and Warnings
Before starting the installation, ensure your vehicle is in a well-ventilated area, and disconnect the battery to prevent electrical shocks. Avoid short circuits and handle electronic components with care. Wear protective gear, including gloves and safety glasses. Never install the system while driving or in hazardous conditions. Follow all local regulations and manufacturer guidelines. Improper installation can lead to system malfunctions or vehicle damage. Always consult a professional if unsure about any step. Safety is paramount for a successful and reliable setup.
1.3. System Overview and Compatibility
The CompuSTAR system is designed for remote start and keyless entry functionality across various vehicles. Compatible with models like CM5200 and CM800-S, it supports advanced features such as temperature monitoring and timer settings. The system works seamlessly with remotes like 2WT13 and 2WR5, offering a user-friendly experience. Ensure compatibility with your vehicle’s make, model, and year before installation; Proper setup requires understanding the wiring diagram and system specifications. This manual guides you through installation, programming, and troubleshooting for optimal performance. Always verify compatibility to ensure smooth operation.

System Components and Accessories
The CompuSTAR system includes a remote start module, remotes, wiring harness, and connectors. Additional sensors and features enhance functionality. Ensure all components are compatible with your vehicle.
2.1. Remote Start Module (e.g., CM5200, CM800-S)
The Remote Start Module is the core of the CompuSTAR system, controlling vehicle startup and keyless entry. Models like CM5200 and CM800-S offer advanced features such as timer settings and temperature monitoring. These modules are designed for seamless integration with compatible vehicles and require precise installation to ensure proper functionality. Always use the provided wiring diagram to connect the module correctly. Professional installation is highly recommended to avoid system malfunctions. Ensure compatibility with your vehicle before proceeding with the installation.
2.2. Remote Controls (2WT13, 2WR5)
The 2WT13 and 2WR5 remotes are designed to control CompuSTAR systems, including remote start, keyless entry, and security features. The 2WT13 is a 2-way, 3-button LCD remote, while the 2WR5 is a 5-button companion remote. Both are compatible with systems like ALARM IT, START IT, and MAX IT. Features may vary depending on the system purchased. The manual supports both remotes, ensuring proper operation and programming. Always refer to the user manual for specific instructions on remote functionality and pairing.
2.3. Wiring Harness and Connectors
The wiring harness and connectors are essential for connecting the CompuSTAR system to your vehicle’s electrical system. The FT-HRN-DC3 harness is designed for wired installations, while T-harnesses are available for iDatastart compatibility. These components ensure seamless integration with your vehicle’s wiring, providing pre-terminated connections for key functions such as ignition, starter, and door locks. Proper installation of the harness is critical for system functionality. Always follow the wiring diagram and manual instructions to avoid errors and ensure reliable operation.
2.4. Additional Sensors and Features
The CompuSTAR system supports various additional sensors and features to enhance functionality. These include dual-zone shock sensors for security, light flash, siren, and horn honk outputs for alarm responses. Optional features like timers and temperature settings can be integrated for convenience. Compatible sensors ensure comprehensive vehicle protection and customization. Always refer to the specific model’s manual for detailed instructions on installing and configuring these advanced features. Proper setup ensures optimal performance and security for your vehicle.

Preparation for Installation
Before starting, review the manual, gather tools, and ensure vehicle compatibility. Consult a dealer for specific requirements. Proper preparation ensures a safe and successful installation.
3;1. Vehicle Compatibility Check
Ensure your vehicle is compatible with the CompuSTAR system. Check the manual or consult a dealer for specific make, model, and year requirements. This step is crucial to avoid installation issues. Verify the system supports your vehicle’s engine type and electrical configuration. Compatibility ensures proper functionality and prevents potential damage. Always refer to the official compatibility list before proceeding with installation. This ensures a smooth and safe setup process for your remote start system. Proper compatibility guarantees optimal performance and reliability.
3.2. Tools and Materials Required
Gather necessary tools and materials before starting the installation. Essential items include a multimeter, soldering iron, wiring tools, and connectors. Ensure you have the correct wiring harness and any additional sensors or features. Refer to the manual for specific requirements. Proper tools ensure a safe and efficient installation process. Always use high-quality materials to maintain system performance and reliability. Having everything prepared beforehand minimizes delays and ensures a professional-grade installation.
3.3. Understanding the Wiring Diagram
The wiring diagram is crucial for a successful installation. It outlines connections between the CompuSTAR module, vehicle systems, and accessories. Carefully review the diagram to identify wires for power, ignition, starter, and accessories. Understand color codes and their functions. Ensure all connections are correct to avoid system malfunctions. Double-check each wire’s placement before securing connections. If unsure, consult a professional technician or refer to the manual for clarification. Accurate wiring ensures proper functionality and safety.
Installation Steps
This section provides a step-by-step guide for installing the CompuSTAR system, covering vehicle preparation, module installation, wiring connections, and system testing. Follow instructions carefully.
4.1. Vehicle Preparation and Disassembly
Begin by ensuring the vehicle is compatible with the CompuSTAR system. Disconnect the battery to prevent electrical shocks or damage. Access the steering column, wiring harness, and ignition system as needed. Remove any components obstructing installation, such as trim panels or the steering wheel. Use a torque wrench and socket set for safe disassembly. Always follow proper safety protocols and refer to the wiring diagram for specific connections. Ensure all tools and materials are ready before proceeding.
4.2. Module Installation and Mounting
Mount the CompuSTAR module in a secure, dry location, typically under the dashboard. Use screws or clips provided to fasten it. Ensure the module is level and protected from moisture. Connect the module to the vehicle’s wiring harness, following the diagram for accurate connections. Avoid over-tightening screws to prevent damage. Once mounted, test the module’s functionality before proceeding to wiring connections.
4.3. Wiring Connections and Configuration
Connect the module’s wires according to the vehicle’s wiring diagram. Ensure the main power wire is linked to the battery and the accessory wire to the ignition. Secure all connections with heat-shrink tubing or solder for reliability. Test each connection to confirm proper functionality. If additional features like door locks or alarms are integrated, follow the manual’s specific instructions. Double-check all wires to prevent short circuits and ensure the system operates smoothly.
4.4. Testing the System
After completing the installation, test the remote start system thoroughly. Press the remote’s start button and confirm the vehicle starts and runs smoothly. Check all features, including door locks, trunk release, and panic mode. Ensure the system responds consistently and functions as expected. Verify proper operation of sensors and alarms if integrated. Test the range of the remote controls and ensure all wiring connections are secure. Address any issues immediately to ensure reliable performance and safety.
Programming the Remote Start System
This section guides you through programming your CompuSTAR remote start system, including primary and additional remotes, and setting up features like timers and temperature control.
Programming the primary remote ensures proper communication between the remote and your CompuSTAR system. Start by entering programming mode: press and hold the start button for 3 seconds until the LED flashes green. Next, press the lock button once, and the LED will flash twice, confirming synchronization. Repeat this process for additional remotes. Ensure all buttons are tested post-programming to verify functionality. Always refer to your system’s specific manual for detailed instructions. Programming additional remotes allows multiple users to control the CompuSTAR system. Start by entering programming mode: press and hold the start button for 3 seconds until the LED flashes green. Insert the additional remote and press the lock button once; the LED will flash twice, confirming synchronization. Repeat for each remote. After programming, test all buttons to ensure proper function. Refer to your system’s manual for specific instructions, as procedures may vary slightly between models. Configure advanced features like timer and temperature settings to enhance your CompuSTAR experience. Use the remote to set a timer for automatic start/stop or adjust the temperature trigger to activate the system when the vehicle reaches a specific temperature. Press and hold the start button for 5 seconds to access the feature menu. Scroll through options using the lock/unlock buttons and confirm settings with the start button. Refer to your manual for default settings and customization options. Ensure all features are tested post-installation for proper function. Identify and resolve common issues like non-responsive remotes, system failures, or error codes. Check battery status, wiring connections, and fuse integrity. Consult the manual for detailed solutions and error code meanings. If your CompuSTAR remote isn’t responding, start by replacing the battery with the correct type specified in the manual. Ensure the remote is properly paired with the system. Check for any wiring issues or connection problems between the module and the vehicle’s electrical system. Verify that the antenna is functioning and not obstructed. Consult the manual for error codes and perform a system reset if necessary. If issues persist, contact an authorized technician for assistance. If the vehicle fails to start, check the wiring connections for the ignition, starter, and accessory circuits. Verify that the remote start module is properly installed and configured. Ensure the vehicle compatibility with the CompuSTAR system. Review the wiring diagram to confirm all connections match your vehicle’s specifications. Test the remote start module by bypassing the remote and using the test button. If issues persist, consult the troubleshooting section or contact an authorized technician for assistance. The CompuSTAR system displays specific error codes to identify issues. For example, E1 indicates a lost communication between the remote and module, while E2 signals a low battery. To resolve these, reprogram the remote or replace the battery. For wiring-related errors, inspect connections for short circuits or improper installation. Refer to the troubleshooting guide for detailed solutions. Always ensure the system is properly grounded and configured to avoid persistent errors. Contact an authorized technician if issues persist after basic troubleshooting. Regularly maintain your CompuSTAR system for optimal performance. Check remote batteries, clean sensors, and update firmware. Schedule periodic inspections to ensure functionality and reliability. To ensure uninterrupted use of your CompuSTAR remote controls, replace batteries as needed. Use the specified battery type for your remote (e.g., CR2032 or CR2450). Open the remote case, carefully remove the old battery, and insert the new one with the correct polarity. Avoid touching the internal components to prevent damage. Replace both batteries if your remote has dual power sources. After installation, test the remote to ensure proper functionality. Refer to your remote’s user manual for specific instructions. Regular battery maintenance ensures reliable operation of your remote start system. Regularly check for CompuSTAR system updates to ensure optimal performance and security. Firmware updates may enhance features, fix bugs, or improve compatibility. Visit the official CompuSTAR website or contact an authorized dealer to verify if updates are available. Use a compatible USB cable and follow the provided instructions carefully. Never attempt to update the firmware without proper guidance, as it may void the warranty or damage the system. Authorized dealers can assist with updates to ensure your remote start system functions correctly and remains secure. Regular cleaning and inspection are crucial for maintaining your CompuSTAR system’s performance. Use a soft cloth to wipe down remotes and modules, avoiding harsh chemicals. Inspect wiring and connections for damage or wear. Check for loose terminals and ensure all components are securely mounted. Clean the remote’s buttons and screen gently to maintain functionality. Schedule annual inspections with an authorized technician to identify potential issues early. This routine maintenance ensures reliable operation and extends the system’s lifespan; Explore advanced features like smartphone integration, security system compatibility, and additional accessories. Customize settings to enhance functionality, ensuring a tailored experience for your vehicle’s remote start system. CompuSTAR systems offer seamless smartphone integration, allowing users to control their vehicle remotely via compatible apps. This feature enables remote start, lock/unlock, and vehicle status checks. CompuSTAR systems can seamlessly integrate with security features like shock sensors, siren systems, and horn honk outputs. This integration enhances vehicle protection by combining remote start functionality with advanced security measures. CompuSTAR systems support various additional accessories for enhanced functionality. These include smartphone integration modules like iDatastart CMHCXA0, which enable app-based control. CompuSTAR systems are backed by a limited warranty covering defects in materials and workmanship. For support, contact Firstech customer service or visit authorized dealers for assistance. CompuSTAR systems are covered under a limited warranty, ensuring protection against defects in materials and workmanship. The warranty period varies by product, typically ranging from one to three years. Coverage includes repairs or replacements for faulty components when installed by authorized dealers. Unauthorized modifications or installations may void the warranty. For specific details, refer to the warranty documentation provided with your purchase or contact Firstech customer support. Proper installation by certified technicians is recommended to maintain warranty validity and ensure optimal system performance. For assistance with your CompuSTAR system, contact our customer support team. They provide expert help with technical issues, troubleshooting, and warranty inquiries. Reach us via phone, email, or through our website. Our support specialists are trained to address a wide range of topics, ensuring you get the help you need efficiently. Visit our official website for contact details and additional resources to resolve your queries promptly and effectively. To locate an authorized CompuSTAR dealer, visit our official website and use the dealer locator tool. Enter your location to find certified professionals near you. Contact local automotive electronics retailers or reach out to Firstech directly for recommendations. Ensure the dealer is authorized to guarantee authentic products and proper installation. Authorized dealers provide expert service, ensuring your system is installed correctly and functions optimally. They also offer support for any post-installation inquiries or issues you may encounter. Congratulations on completing the CompuSTAR installation manual. This guide has provided essential steps for a successful setup. By following the instructions carefully, you ensure your system operates safely and efficiently. Ensure all components are securely installed and connected. Verify remote functionality and system features. Double-check wiring connections and configurations. Test remote start, keyless entry, and security functions. Confirm proper programming of remotes and settings. Review error codes and resolve any issues. Perform a final inspection of the vehicle’s electrical system. Ensure all safety precautions were followed. Refer to troubleshooting guides if necessary. Contact an authorized dealer for any unresolved concerns. Complete the installation log for future reference. For optimal performance, ensure all connections are secure and free from corrosion. Regularly update the system firmware and software. Maintain remote batteries and replace them as needed. Avoid exposing components to extreme temperatures or moisture. Test the system frequently to identify potential issues early. Follow manufacturer guidelines for programming and customization. Keep the wiring harness organized to prevent damage. Schedule annual inspections with an authorized dealer to ensure proper functionality. This will enhance reliability, efficiency, and longevity of your CompuSTAR system. Professional installation ensures your CompuSTAR system is set up correctly, minimizing risks of electrical damage or malfunctions. Authorized technicians have the expertise to handle complex wiring and programming, ensuring compatibility with your vehicle. They follow safety protocols and manufacturer guidelines, guaranteeing optimal performance and reliability. Professional installation also prevents voiding your vehicle’s warranty and ensures compliance with safety standards. It’s highly recommended to seek certified professionals for a seamless and trouble-free experience with your remote start system.5.1. Programming the Primary Remote
5.2. Programming Additional Remotes
5.3. Setting Up Features (e.g., Timer, Temperature)

Troubleshooting Common Issues
6.1. Remote Not Responding
6.2. System Not Starting the Vehicle
6.3. Error Codes and Solutions

Maintenance and Upkeep
7.1. Remote Battery Replacement
7.2. System Updates and Firmware
7.3. Cleaning and Inspection

Advanced Features and Customization
8.1. SmartPhone Integration
With smartphone integration, users can enjoy enhanced convenience and real-time monitoring of their vehicle’s security and remote start functions. Ensure your system is updated and configured correctly for optimal performance.
Consult the manual for specific setup instructions and compatibility requirements to integrate your smartphone with the CompuSTAR system effectively.8.2. Security System Integration
The system supports dual-zone shock sensors, providing alerts for light and heavy impacts. When integrated, the remote start and security systems work together to offer comprehensive vehicle protection.
Ensure proper configuration during installation for optimal performance and security. Refer to the manual for specific integration steps and compatibility details.8.3. Additional Accessories Setup
Optional sensors, such as temperature monitors, can be integrated to activate remote start based on vehicle interior conditions.
Ensure all accessories are compatible with your system and follow the manual for proper installation and configuration.
Professional installation is recommended to ensure seamless integration and optimal performance of all added features.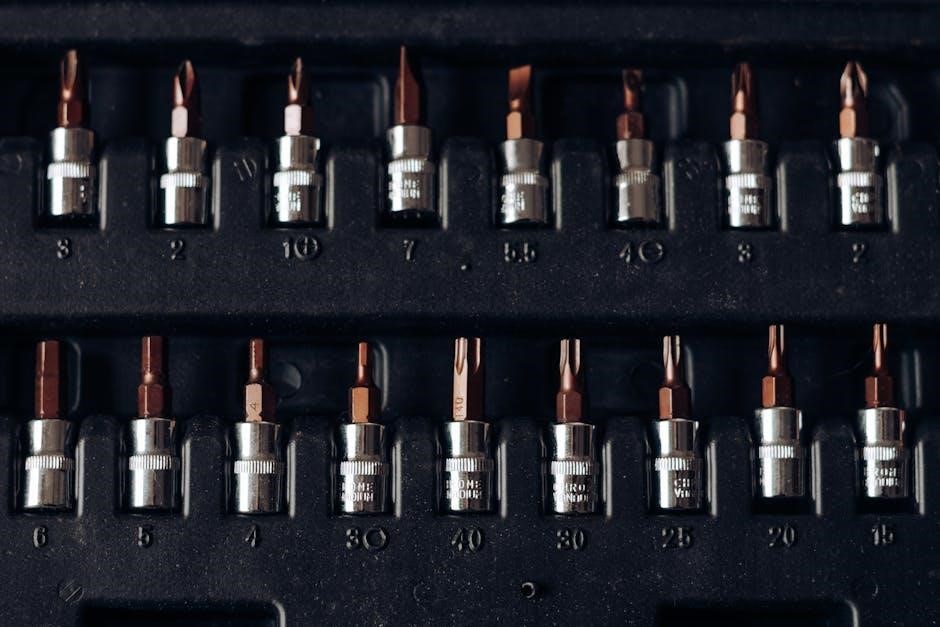
Warranty and Support Information
9.1. Warranty Coverage and Terms
9.2. Contacting Customer Support
9.3. Finding Authorized Dealers
10.1. Final Checklist for Installation
10.2. Tips for Optimal Performance
10.3. Importance of Professional Installation
Be First to Comment