Welcome to the Minolta X-700 Camera Manual. This guide helps you master the iconic X-700, exploring its features, operation, and legacy as a photography landmark.
1.1 Overview of the Minolta X-700 Camera
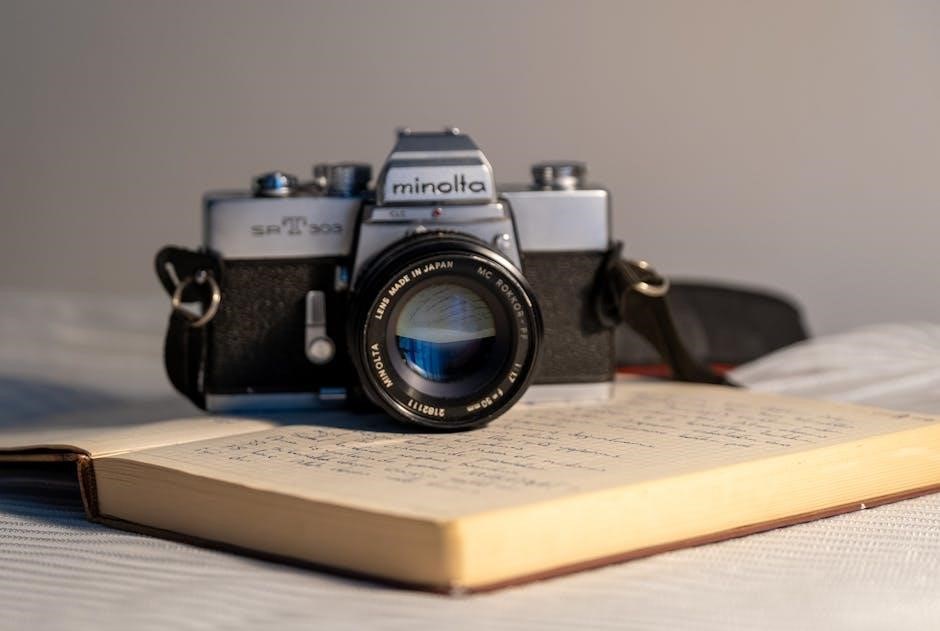
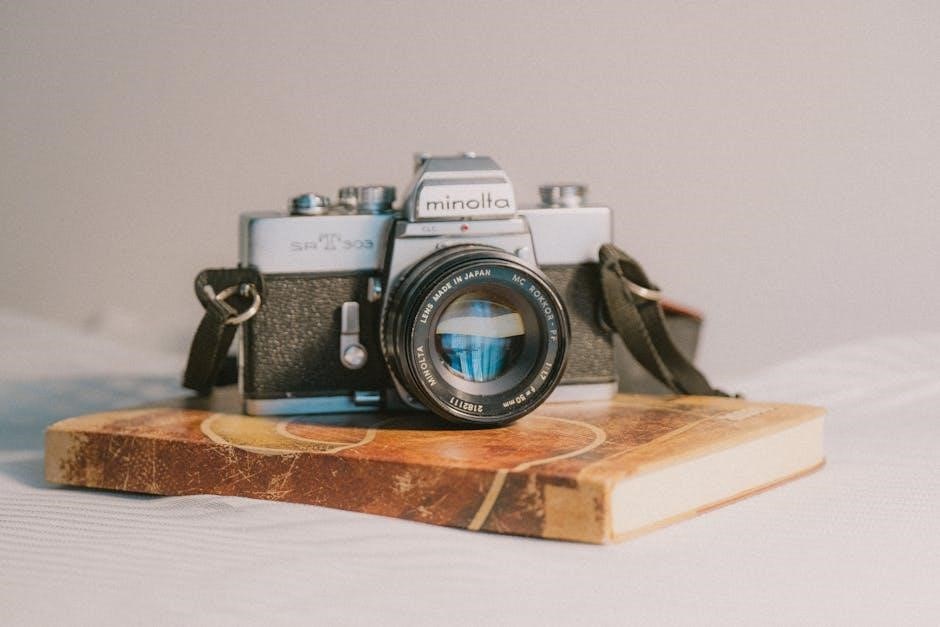
The Minolta X-700 is a landmark 35mm SLR camera renowned for its robust build, intuitive design, and advanced features. Designed for both professionals and enthusiasts, it balances traditional controls with modern innovations. As part of Minolta’s SR system, it offers compatibility with a wide range of lenses and accessories. With its blend of manual and automated functions, the X-700 remains a popular choice among film photographers today, providing creative control and reliability. This manual serves as your guide to unlocking its full potential and mastering its capabilities.
1.2 Importance of the Manual for Optimal Use
The manual is essential for unlocking the full potential of the Minolta X-700. It provides detailed insights into the camera’s features, operation, and customization options, ensuring users can maximize its capabilities. Understanding the manual enables photographers to troubleshoot common issues, optimize settings, and achieve consistent results. Whether you’re a beginner or an experienced photographer, this guide serves as a valuable resource for mastering the X-700 and enhancing your photography skills effectively.
1.3 Brief History and Significance of the Minolta X-700
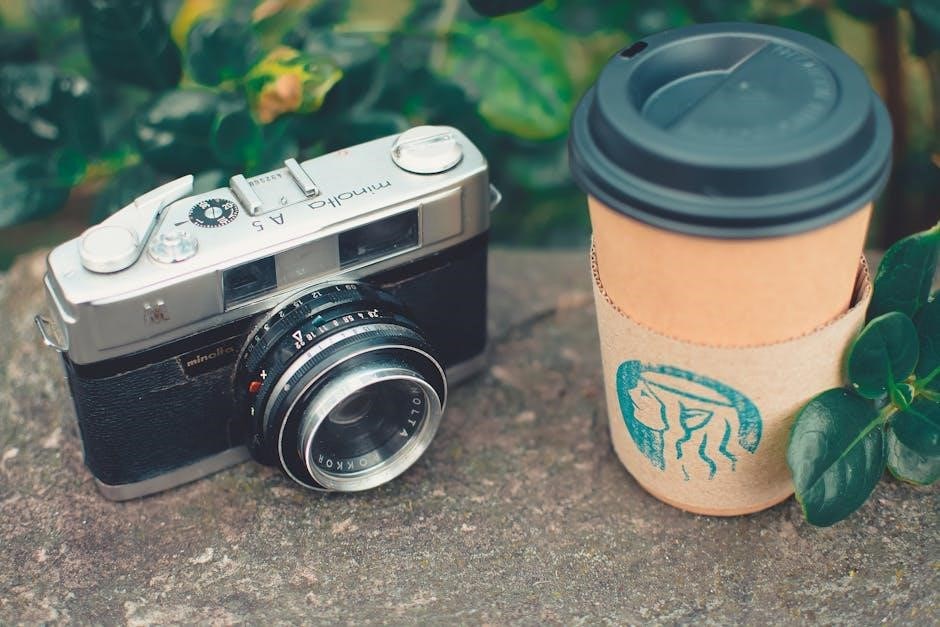
The Minolta X-700, released in 1981, marked a significant milestone in Minolta’s history as a leader in photography. Known for its advanced features and user-friendly design, it quickly became a favorite among professionals and hobbyists. The X-700 was the first camera to introduce TTL (Through-The-Lens) flash metering and aperture priority mode, setting new standards in photography. Its durability and innovative technology made it a cornerstone of Minolta’s legacy, remaining popular even today among film enthusiasts and collectors.
Key Features of the Minolta X-700
The X-700 boasts a durable build, advanced metering modes, wide aperture and shutter ranges, and compatibility with a variety of lenses, flashes, and accessories, enhancing versatility.
2.1 Build Quality and Design
The Minolta X-700 boasts a robust build quality, featuring a durable copper-aluminum alloy body that ensures longevity and reliability. Its ergonomic design provides a comfortable grip, reducing fatigue during extended use. The camera’s intuitive control layout places essential functions at fingertips, enhancing operational ease. The X-700’s compact yet sturdy frame makes it a practical choice for both professionals and enthusiasts. Its timeless design has contributed to its enduring popularity, blending functionality with an aesthetic appeal that reflects its era. This build quality has made the X-700 a trusted companion for photographers worldwide.
2.2 Metering Modes and Exposure Control
The Minolta X-700 offers advanced metering modes, including spot, center-weighted, and matrix metering, ensuring precise exposure control. Photographers can adjust settings manually or rely on the camera’s automatic modes; Exposure compensation allows fine-tuning, while bracketing enables capturing multiple exposures for optimal results. The built-in light meter provides accurate readings, and the camera supports flash synchronization for balanced lighting. These features empower users to achieve professional-grade photos with ease, catering to both novice and experienced photographers.
2.3 Shutter Speed and Aperture Range
The Minolta X-700 offers a wide range of shutter speeds, from 1/1000th of a second to 1 second, plus a bulb mode for extended exposures. The aperture range varies by lens but typically spans from f/1.7 to f/16. This flexibility allows photographers to achieve precise control over exposure, enabling creative techniques like freezing fast motion or creating artistic blur. The camera also features an interlocking shutter and aperture system, ensuring balanced exposures while maintaining ease of use. These capabilities make the X-700 versatile for various photographic scenarios.
2.4 Flash and Accessory Compatibility
The Minolta X-700 offers excellent flash and accessory compatibility, enhancing its versatility. It features a built-in hot shoe for direct flash mounting and supports Minolta’s dedicated flash units, such as the 2805 and 360px. Additionally, it is compatible with a wide range of third-party flashes and accessories, including remote triggers and lens adapters. This adaptability makes it easy to expand the camera’s capabilities for various lighting setups, ensuring optimal performance in both casual and professional photography contexts.
Understanding the Manual
This section guides you through the structure and content of the Minolta X-700 manual, helping you navigate its key sections, symbols, and setup instructions effectively.
3.1 Structure and Navigation of the Manual
This manual is organized into clear sections to help you navigate effortlessly. It begins with an introduction, followed by key features, operational modes, and advanced techniques. Each section is divided into subsections, ensuring detailed coverage without overwhelming the user. The logical flow allows you to progress from basic to complex topics, mastering the camera step by step. Visual aids, such as diagrams and tables, are included to enhance understanding. This structured approach ensures that both beginners and seasoned photographers can quickly find the information they need.
3.2 Key Symbols and Terminology
Understanding the symbols and terminology in your Minolta X-700 manual is crucial for optimal use. Common symbols include aperture (f-stop), shutter speed (seconds or fractions), and ISO (film sensitivity). Terms like “metering mode” refer to how light is measured, while “exposure compensation” adjusts brightness. The mode dial symbols—’P’ (Program), ‘A’ (Aperture Priority), ‘S’ (Shutter Priority), and ‘M’ (Manual)—indicate shooting modes. Familiarize yourself with terms like “sync speed” (flash synchronization) and “self-timer” for better control. This knowledge enhances your ability to use the camera creatively and effectively.
3.3 Step-by-Step Guide to Initial Setup
To begin, load film by opening the camera back and aligning the film leader with the spool. Set the ISO on the camera to match the film speed. Next, set the date and time using the control panel. Familiarize yourself with the mode dial, aperture, and shutter controls. Ensure the battery is installed and functioning. Attach a lens, focusing on the subject using the viewfinder. Finally, perform a quick function check to ensure proper operation before taking your first shot. This setup process ensures you’re ready to capture stunning images.
3.4 Customizing Settings for Personal Preference
Customizing your Minolta X-700 allows you to tailor its performance to your shooting style. Adjust exposure compensation, metering modes, and focus settings to suit your creative vision. Explore the camera’s programmable features, such as custom function assignments, to streamline your workflow. Experiment with different configurations to enhance comfort and efficiency. This personalization ensures the X-700 adapts to your unique photography needs, making it an extension of your artistic process. Always refer to the manual for detailed guidance on customization options.
Operation Modes
The Minolta X-700 offers four operation modes: Manual, Aperture Priority, Shutter Priority, and Program Mode, each providing unique control over exposure for enhanced creativity and precision.
4.1 Manual Mode
Manual Mode offers full control over aperture and shutter speed, allowing photographers to fine-tune exposures for creative results. To activate, set the mode dial to “M.” Adjust the aperture using the lens ring and shutter speed with the dial on the camera’s top. The exposure meter in the viewfinder provides guidance, but settings are entirely manual. This mode is ideal for experienced photographers seeking precision or those learning the fundamentals of exposure. Use it for landscapes, portraits, or low-light conditions where exact control is needed.
4.2 Aperture Priority Mode
Aperture Priority Mode on the Minolta X-700 allows you to set the aperture manually, with the camera automatically adjusting the shutter speed for optimal exposure. This mode is ideal for controlling depth of field—use a large aperture (small f-stop) for a shallow focus effect or a small aperture (large f-stop) for greater depth. To activate, turn the mode dial to ‘A’ and adjust the aperture using the lens aperture ring. The camera will display the selected aperture and corresponding shutter speed in the viewfinder or LCD. Experiment with different apertures to achieve your desired artistic effect while letting the camera handle the exposure timing.
4.3 Shutter Priority Mode
In Shutter Priority Mode, you set the desired shutter speed, and the camera automatically adjusts the aperture for proper exposure. This mode is ideal for controlling motion effects, such as freezing fast-moving subjects or creating artistic blur. To activate it, turn the mode dial to the ‘Tv’ position. Use the shutter speed dial to select speeds between 4 seconds and 1/1000th of a second. The X-700 also offers a bulb (B) setting for extended exposures. This mode is perfect for sports, action, or low-light photography, giving you creative control over time and motion in your images.
4.4 Program Mode
The Program Mode on the Minolta X-700 offers a fully automatic shooting experience, perfect for beginners or quick situations. The camera automatically selects both aperture and shutter speed to ensure optimal exposure. This mode is ideal for versatile shooting scenarios, allowing you to focus on composition without manual adjustments. It adapts well to various lighting conditions, providing consistent results. For added control, you can shift the program by adjusting the exposure compensation dial. This mode is a great starting point for learning photography basics before transitioning to manual modes.
Advanced Techniques
Master advanced photography techniques with the Minolta X-700, enhancing your creative control and capturing stunning images with precision and artistry.
5.1 Using the Light Meter Effectively
The Minolta X-700’s built-in light meter is a powerful tool for achieving perfect exposures. It offers three modes: spot, center-weighted, and matrix metering, each suited for different lighting conditions. To use it effectively, ensure the lens is clean and free of obstructions. In spot metering, aim at your subject’s mid-tones for accurate readings. For backlit scenes, use exposure compensation to adjust brightness. Bracketing shots can help capture a range of exposures, ensuring the best result. Always check the meter’s needle alignment for proper settings. Practice with various lighting scenarios to master its capabilities.
5.2 Bracketing and Multiple Exposures
Bracketing on the Minolta X-700 allows capturing multiple shots at different exposures to ensure optimal results. Use manual mode and adjust exposure compensation to create a series of images. For multiple exposures, enable the feature via the camera’s menu or custom settings. This technique layers images on a single frame, ideal for creative effects like ghosting or blending. Use a tripod to align shots precisely. Review images to select the best exposure or combine them for artistic purposes. This feature enhances flexibility in challenging lighting conditions and creative photography projects.
5.3 Focus and Depth of Field Control
The Minolta X-700 offers precise focus control, enabling photographers to achieve sharp images. Depth of field is managed through aperture settings, allowing creative control over background blur. Use Aperture Priority mode to adjust depth of field effectively. The lens aperture directly impacts the in-focus area, while shutter speed influences motion blur. Experiment with different combinations to master focus and depth of field for professional results.
5.4 Using Flash and External Lighting
The Minolta X-700 supports a built-in flash system and external lighting options, enhancing creativity in low-light conditions. The camera’s flash metering ensures balanced exposures. For external lighting, use the X-sync mode at 1/60s or slower. Slow-sync mode combines flash with ambient light for natural results. Experiment with bounce flash techniques for softer illumination. External flash units, like the Minolta 2800AF, offer greater power and flexibility. Always sync your flash with the camera’s hot shoe or PC terminal for optimal performance. Proper use of flash and external lighting elevates your photography to new levels of quality and artistry.
Accessories and Compatibility
Explore lenses, flash units, tripods, and film options designed for the Minolta X-700. Learn about compatibility with Minolta’s SR-mount system and how to enhance functionality and creativity through these accessories.
6.1 Lenses and Lens Adapters
The Minolta X-700 is compatible with a wide range of Minolta SR-mount lenses, offering versatility for various photography needs. From wide-angle to telephoto, these lenses deliver exceptional optical quality. Adapters are available for modern digital cameras, extending the X-700’s functionality. Prime lenses like the 50mm f/1.7 are ideal for portraits, while zoom lenses provide flexibility. Ensure compatibility when selecting third-party adapters to maintain optimal performance. Explore the vast lens ecosystem to unlock the X-700’s full creative potential.
6.2 Flash Units and Remote Triggers
The Minolta X-700 supports various flash units, including the Minolta 20, 40, and Auto 400X. These flashes offer TTL metering for precise exposures. The camera’s hot shoe and PC sync port enable easy connection. For wireless control, remote triggers can be used, allowing off-camera flash setups. This enhances creativity and reduces sync cord dependency; Remote triggers are ideal for studio or outdoor photography, ensuring reliable flash firing. Always test synchronization before shooting to avoid misfires. Using compatible flashes and triggers maximizes the X-700’s potential for professional-grade lighting.
6.3 Tripods and Stabilization Tools
Using a tripod with the Minolta X-700 ensures stability, especially in low-light conditions or with slow shutter speeds. Choose a sturdy tripod with a smooth pan-and-tilt head for precise control. For added stability, consider a tripod with a quick-release plate for easy camera mounting. Monopods are another option for handheld shooting, offering portability and reduced shake. Gimbal heads are ideal for tracking moving subjects. These tools enhance sharpness and reduce camera vibrations, making them essential for professional-grade photography with the X-700. Invest in a high-quality tripod to maximize your camera’s potential.
6.4 Film and Development Best Practices
For optimal results with your Minolta X-700, use high-quality ISO film suitable for your shooting conditions. Load film in low-light conditions to avoid exposure. Store film in a cool, dry place and use it before the expiration date. For development, ensure precise processing to maintain image quality. Consider using a professional lab or closely following home development guidelines. Adjust development times based on personal preference for grain and contrast. Always handle negatives with care, store them properly, and digitize for long-term preservation.
Troubleshooting Common Issues
This section helps identify and resolve common issues with the Minolta X-700, such as blurry images or exposure problems. Learn to diagnose symptoms, adjust settings, clean properly, and restore functionality for optimal performance.
7.1 Common Errors and How to Fix Them
The Minolta X-700 may occasionally display errors such as incorrect meter readings or shutter malfunctions. To resolve these, ensure the battery is fresh and contacts are clean. For metering issues, check that the lens is properly mounted and the aperture is set correctly. If the shutter fails to fire, verify the camera is in manual mode and the shutter speed is set appropriately. For persistent problems, consult the troubleshooting section or refer to professional maintenance guidelines to restore optimal functionality.
- Faulty meter readings: Clean battery contacts and ensure proper lens alignment.
- Shutter issues: Check manual mode settings and verify battery power.
- Lens errors: Ensure the lens is securely mounted and aligned with the camera body.
7.2 Maintenance and Cleaning Tips
Regular maintenance ensures your Minolta X-700 performs optimally. Clean the camera body with a soft, dry cloth. For lenses, use a microfiber cloth and lens cleaning tissue. Avoid harsh chemicals. The viewfinder can be cleaned with a slightly damp microfiber cloth. Internal components like the mirror and shutter should be inspected for dust but only cleaned by professionals to avoid damage. Store the camera in a dry place to prevent mildew. Use silica gel packets to maintain humidity control. Regularly check and clean the film compartment and battery contacts for optimal function.
7.3 Battery and Power Management
The Minolta X-700 uses a 6V silver-oxide battery (SR44 or equivalent) for its metering and electronic functions. Always use fresh batteries for reliable performance. Check voltage with a battery tester before installation. Insert the battery correctly, ensuring proper polarity. If the camera shows erratic metering or slow shutter speeds, the battery may be low. Store spare batteries in a cool, dry place. Avoid mixing old and new batteries. For long-term storage, remove the battery to prevent corrosion. Clean the battery contacts periodically with a soft cloth.
7.4 Resolving Metering and Focusing Problems
Metering issues can arise from dirt on the lens or incorrect exposure settings. Clean the lens and ensure proper aperture and shutter speed alignment. For focusing problems, check if the lens is properly mounted and free from debris. Use the viewfinder’s focusing aids for accuracy. If issues persist, consult a professional technician. Regular maintenance and proper handling can prevent such problems, ensuring optimal performance from your Minolta X-700 camera.
Legacy and Modern Use
The Minolta X-700 remains a timeless classic, bridging analog and digital eras. Its enduring appeal lies in its versatility, making it a favorite for film photography and modern workflows alike.
8.1 The Minolta X-700 in Today’s Photography
The Minolta X-700 remains a beloved tool in modern photography, cherished by film enthusiasts and professionals alike. Its robust build, intuitive manual controls, and compatibility with a wide range of Minolta MD/MC lenses make it versatile for both casual and artistic photography. Many photographers appreciate its tactile shooting experience, offering a refreshing alternative to digital cameras. The X-700’s metering accuracy and creative modes allow for precise control over exposures, making it a favorite for those who enjoy the challenge and reward of film photography. Its enduring popularity is a testament to its timeless design and functionality.
8.2 Comparing with Modern DSLR and Mirrorless Cameras
The Minolta X-700 stands out when compared to modern DSLR and mirrorless cameras, blending simplicity with precision. While modern cameras offer advanced autofocus, video capabilities, and higher ISO ranges, the X-700 excels in tactile controls and mechanical reliability. Its manual focus and aperture priority mode appeal to purists, while modern cameras rely on automation. The X-700’s durable build and intuitive design make it a favorite among film enthusiasts, even as mirrorless systems dominate today’s market. Its legacy endures as a tool for photographers seeking a hands-on shooting experience.
8.3 Community and Resources for X-700 Users
The Minolta X-700 has a vibrant community of enthusiasts and professionals who share knowledge, tips, and resources. Online forums, social media groups, and specialized photography communities dedicated to the X-700 provide a wealth of information. Additionally, blogs, YouTube channels, and workshops often feature tutorials and user experiences. Many photographers and collectors actively contribute, fostering a supportive environment for learning and creativity. These resources help users maximize their camera’s potential and stay connected with like-minded individuals.
8.4 Collecting and Preserving the X-700
The Minolta X-700 has become a sought-after collectible for photography enthusiasts. To preserve its value, ensure the camera is in excellent condition with original accessories. Store it in a dry, cool place, away from direct sunlight. Regular cleaning and proper maintenance are essential to keep it functional. For collectors, rare or limited-edition models are highly prized. Joining a community of X-700 enthusiasts can provide valuable resources for restoration and upkeep. Proper care ensures this iconic camera remains a cherished possession for years to come.
Mastering the Minolta X-700 empowers photographers to embrace both creativity and technical precision, ensuring timeless results. This manual serves as your gateway to unlocking its full potential effortlessly.
9.1 Summary of Key Takeaways
The Minolta X-700 is a legendary film SLR that blends manual control with advanced features. Its metering modes, aperture/shutter priority, and program mode offer versatility. Accessories like lenses, flashes, and tripods enhance functionality. Regular maintenance and proper film handling ensure optimal performance. Troubleshooting tips and battery management are essential for longevity. While modern cameras offer digital convenience, the X-700 remains a cherished tool for photographers seeking tactile control and creative expression. This manual provides a comprehensive guide to unlocking its full potential and preserving its legacy.
9.2 Final Tips for Mastering the Minolta X-700
To fully master the Minolta X-700, practice regularly and experiment with its versatile modes. Understand your subject’s lighting and compose shots thoughtfully. Keep the camera clean and well-maintained to ensure optimal performance. Explore its accessory ecosystem, such as lenses and flash units, to expand creative possibilities. Study the manual thoroughly and familiarize yourself with shortcuts for quick adjustments. Embrace the camera’s analog charm and use it to refine your photography skills. Remember, mastery comes with patience and practice—enjoy the journey with this iconic camera.
Be First to Comment