Guitar pickup wiring is the process of connecting pickups, pots, and switches to capture and shape your guitar’s tone. Proper wiring ensures optimal sound quality and functionality, making it essential for guitarists seeking precise control over their instrument’s voice.
1.1 What is Guitar Pickup Wiring?
Guitar pickup wiring refers to the electrical connections between pickups, tone and volume controls, and switches. It determines how your guitar’s pickups interact to produce sound. This process involves soldering wires to ensure signals are properly routed through the guitar’s electronics. Pickup wiring dictates the tone, output, and functionality of the instrument, making it a critical aspect of guitar customization and maintenance. Understanding it allows players to tailor their sound and fix or upgrade their guitar’s electronics effectively.
1.2 Importance of Proper Wiring
Proper guitar pickup wiring is essential for achieving optimal sound quality and functionality. Correct connections ensure pickups, pots, and switches work harmoniously, delivering the desired tone. Improper wiring can cause hum, buzzing, or signal loss, affecting performance. Good wiring enhances versatility, allowing tonal configurations and mods. Attention to detail ensures reliability and durability, crucial for professional-grade sound and functionality.
Understanding Guitar Pickups
Guitar pickups convert string vibrations into electrical signals, shaping the instrument’s sound. Different pickups and configurations significantly impact tone, dynamics, and overall musical expression.
2.1 Types of Guitar Pickups
Guitar pickups are categorized into single-coil and humbucker types. Single-coil pickups deliver bright, crisp tones but may pick up hum, while humbuckers offer warmer, fuller sounds with reduced noise. Active pickups, powered by batteries, provide aggressive, high-gain tones. Each type is designed for specific musical genres and playing styles, allowing guitarists to achieve their desired sound. Understanding these differences helps in selecting the right pickups for your guitar and musical needs.
2.2 How Pickups Work
Guitar pickups convert string vibrations into electrical signals. A magnet attracts the strings’ vibrations, which disturb a coil of wire, creating a varying current. This current travels through the guitar’s wiring to tone and volume controls, then to an amplifier. Passive pickups rely solely on their magnetic coil, while active pickups use a battery-powered preamp for enhanced output and clarity. The design and materials of the pickup greatly influence the tone, making them a critical component in shaping a guitar’s sound.
Tools and Materials Needed
Essential tools include a soldering iron, wire cutters, and multimeter. Materials needed are insulated wire, solder, and electrical tape for secure connections.
3.1 Essential Tools for Wiring
For guitar pickup wiring, essential tools include a soldering iron for secure connections, wire cutters to trim excess wire, and a multimeter to test circuits. A wire stripper is needed to expose wire ends, while screwdrivers and pliers assist with hardware adjustments. Additional tools like a work light or magnifying glass enhance precision. Using high-quality tools ensures reliable connections and a professional setup, making the wiring process safer and more efficient.
3.2 Materials Required
Key materials for guitar pickup wiring include high-quality shielded wire to minimize noise and solder for durable connections. Pickup selector switches, volume and tone pots, and output jacks are essential components. Capacitors and resistors may be needed for tone shaping. Heat shrink tubing and electrical tape protect wires from damage. Using the right materials ensures optimal performance and longevity, while preventing interference and hum in your guitar’s signal path.

Basic Guitar Wiring Concepts
Guitar wiring involves understanding soldering, component connections, and signal flow. Properly linking pickups, pots, and switches ensures clear tone and functionality, forming the foundation of your setup.
4.1 Understanding Soldering
Soldering is a critical skill in guitar wiring, creating reliable electrical connections between components. It involves melting solder onto metal junctions to ensure conductivity and durability. Essential tools include a soldering iron, solder, and a cleaning sponge. Proper technique requires heating the components first, not the solder directly. Use minimal solder to avoid excess, and ensure a clean, shiny joint. Safety is key—use a soldering iron stand and avoid touching hot tips. Common mistakes include cold soldering or applying too much solder, which can cause shorts. Practice on scrap materials to refine your skills.
4.2 Reading Wiring Diagrams
Reading wiring diagrams is essential for successful guitar pickup wiring. These diagrams visually represent the circuit, showing connections between pickups, pots, switches, and output jacks. Symbols like circles for jacks and rectangles for pots simplify understanding. Lines indicate wires, and colors often denote specific connections. Start by identifying components and their roles. Follow the flow of the signal chain, from pickups to output. Pay attention to soldering points and ground connections. If confused, compare the diagram to your guitar’s layout. Practice interpreting diagrams to build confidence and accuracy in your wiring projects.

Types of Guitar Pickup Configurations
This section explores the various ways pickups can be configured in a guitar, including single-coil, humbucker, and active vs. passive setups, to achieve desired tone and versatility.
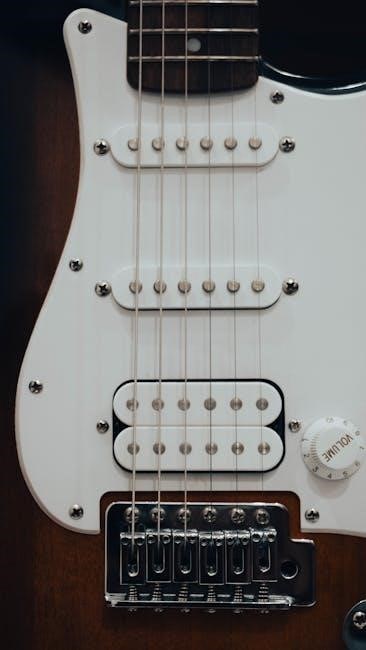
5.1 Single-Coil Pickups
Single-coil pickups are the most common type, known for their bright, articulate tone and excellent string clarity. Introduced by Leo Fender, they use a single magnet wrapped in a coil of wire to capture vibrations. Their simple design makes them lightweight and cost-effective. Single-coils are highly versatile, suitable for various genres, from clean jazz to gritty rock. However, they can be prone to hum when near external interference. Despite this, their brightness and articulation make them a favorite among players seeking a dynamic, responsive sound with rich harmonic content.
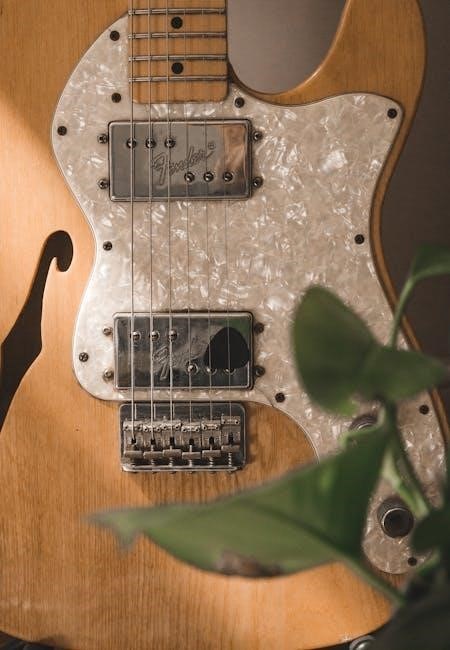
5.2 Humbucker Pickups
Humbucker pickups are designed to reduce hum and noise, achieving this by using two coils wound in opposite directions. This dual-coil design cancels out external interference, providing a warm, full, and sustain-rich tone. Humbuckers are commonly used in rock, metal, and jazz for their robust sound and versatility. They are often preferred for their ability to deliver thick, distortion-friendly tones while maintaining clarity. Compared to single-coils, humbuckers offer more sustain and a smoother midrange, making them ideal for players seeking a powerful, noise-free sound with excellent dynamic range.
5.3 Active vs. Passive Pickups
Active and passive pickups differ in their circuitry and tone. Passive pickups rely on magnets and coils, offering a warm, organic sound with natural dynamics. They require no battery, making them simple and reliable. Active pickups, however, use an internal preamp powered by a battery, delivering hotter output, increased clarity, and reduced hum. Active pickups are popular in metal and hard rock for their aggressive tone but may lack the organic feel of passive designs. Both types cater to different playing styles and tonal preferences.
Step-by-Step Pickup Wiring Guide
This guide provides a detailed, sequential approach to wiring guitar pickups, ensuring a smooth and effective setup. Follow each step carefully to achieve the desired tone and functionality.
6.1 Preparing the Guitar
Before starting the wiring process, ensure your guitar is properly prepared. Remove the strings to prevent interference and discharge the electronics by touching the bridge. Take out the bridge and neck pickups to access the wiring cavity. Shield the cavity with conductive paint or copper tape to reduce noise. Organize your tools and materials, and disconnect the battery if it’s an active pickup system. Protect the guitar’s finish with tape, and clean the area to avoid dust. Good lighting and a clear workspace are essential for precise work.
6.2 Installing the Pickups
Begin by aligning the pickups in their respective slots, ensuring proper spacing and orientation. Use a ruler or gauge to achieve accurate placement. Secure the pickups with screws or springs, tightening them gently to avoid stripping the wood. Connect the pickup wires to the correct terminals on the wiring harness, ensuring the positive and negative wires are matched correctly. Double-check the polarity to maintain hum-canceling properties. Apply a small amount of adhesive or spring tension to keep the pickups stable. Finally, verify the pickup height for optimal tone and adjust as needed before proceeding.
6.3 Connecting the Wiring Harness
Connect the wiring harness to the pickups by soldering the positive and negative wires to the correct terminals. Ensure the output jack is securely soldered to the harness. Twist or shield any unused wires to minimize noise. Ground the bridge and tremolo system if applicable. Use heat shrink tubing to insulate solder joints. Finally, organize the wires neatly and secure them with cable ties or adhesive to prevent interference and ensure reliable connectivity throughout the guitar.
6.4 Final Soldering and Testing
Once all connections are made, inspect the wiring for any solder bridges or loose joints. Use a multimeter to verify continuity and ensure no short circuits. Plug in the guitar and test each pickup’s operation, checking for hum, noise, or signal loss. If issues arise, trace the wiring to identify and repair the problem. Finally, play the guitar to confirm proper tone and functionality. This step ensures your wiring job is reliable and delivers the desired sound quality. Proper testing is crucial for long-term performance and satisfaction.
Common Pickup Wiring Modifications
Common pickup wiring modifications include coil splitting and phase switching, offering enhanced versatility and tonal options for players seeking expanded sound possibilities. These tweaks allow for a broader range of tonal experimentation, making them popular among guitarists aiming to customize their instrument’s voice.
7.1 Coil Splitting
Coil splitting modifies humbucker pickups to function like single-coils, enhancing tonal versatility. By engaging a switch or push-pull pot, one coil is deactivated, delivering a brighter, snappier sound. Benefits include accessing single-coil clarity and articulate tones, ideal for various musical styles. However, this may introduce hum, as noise-cancelling is disabled. Implementation involves soldering and wiring adjustments, which can be challenging for novices. Common in rock and metal guitars, coil splitting offers versatility, though it may require professional assistance for optimal setup.
7.2 Phase Switching
Phase switching involves reversing the phase of one pickup coil relative to another, creating a unique tonal interaction. When pickups are out of phase, their combined sound produces a bright, articulate tone with a hollow, quacky quality. This modification is popular in guitars with multiple pickups, such as the Stratocaster’s middle position. A DPDT switch or push-pull pot is typically used to engage this feature. Phase switching is ideal for rhythm and lead playing, offering a versatile tonal palette. It’s a simple yet effective mod for enhancing guitar versatility and exploring new sounds.
7.3 Active Pickup Upgrades
Active pickup upgrades involve replacing passive pickups with active designs that include an internal preamp. These systems, powered by a battery, provide a hotter signal and reduced hum. Active pickups deliver crisp, articulate tones with excellent clarity, especially for high-gain playing. They are ideal for metal and hard rock, offering consistent output across the fretboard. Installation requires adding a battery compartment and wiring the preamp, making it more complex than passive setups. Active upgrades offer tonal versatility and reliability, appealing to musicians seeking modern, aggressive sounds with minimal noise interference.

Troubleshooting Common Wiring Issues
Troubleshooting wiring issues involves identifying and resolving problems like bad solder joints, faulty pickups, or incorrect connections. Common symptoms include no sound, hum, or intermittent signal loss. Always start by checking ground connections and ensuring all wires are securely soldered. A multimeter can help verify continuity and detect short circuits. Patience and a systematic approach are key to diagnosing and fixing wiring problems effectively, ensuring your guitar sounds its best.
8.1 Identifying Wiring Problems
Identifying wiring issues begins with recognizing symptoms like no sound, hum, or intermittent signal. Check for loose connections, faulty pickups, or bad solder joints. Verify the wiring harness is grounded properly, as poor grounding often causes noise or hum. Use a multimeter to test for continuity and short circuits between wires or pickups. Visually inspect the wiring for damage or oxidation. Note inconsistent tone or volume loss, which may indicate a failed potentiometer or switch. Systematically isolating components helps pinpoint the source of the problem, ensuring accurate diagnosis and repair.
8.2 Fixing Grounding Issues
Grounding issues are common in guitar wiring and can cause hum, noise, or electrical shock. To fix them, start by ensuring all components are properly grounded. Inspect the ground wires for breaks or corrosion and clean or replace them as needed. Verify that the bridge and tailpiece are securely grounded to the guitar’s electronics. Use a multimeter to test continuity between ground points. Re-solder any loose connections and ensure shields are properly connected. Finally, test the guitar to confirm the grounding issues are resolved and the instrument operates quietly and safely.
8.3 Resolving Hum and Noise
Hum and noise in a guitar can be caused by poor shielding, faulty wiring, or environmental interference. To resolve this, first, ensure the guitar cavity is properly shielded with conductive paint or foil. Check all solder joints for cracks or oxidation and re-solder as needed. Replace any noisy or damaged pickups and ensure all connections are secure. Use a noiseless cable and verify the grounding system is intact. If hum persists, consider installing a noise gate or using humbucker pickups. Always test the guitar in different environments to identify the source of the interference.
Safety Precautions and Best Practices
Always unplug the guitar before wiring to avoid electrical shock. Use proper soldering techniques and keep a clean workspace. Handle components carefully to prevent damage.
9.1 Working Safely with Electricity
When working with guitar electronics, always unplug the instrument to avoid electrical shock. Use insulated tools and ensure all components are de-energized. Never touch live circuits or wires. Keep the workspace dry and avoid wearing jewelry that could conduct electricity. Use a soldering iron with a temperature control and keep it on a stand when not in use. If working with active pickups, disconnect the battery first. Be cautious of capacitors, as they can store charge even when powered off. Safety is paramount to protect yourself and your gear.
9.2 Avoiding Common Mistakes
To ensure successful wiring, avoid common pitfalls such as reversing polarity, misidentifying wires, or soldering at incorrect temperatures. Always double-check diagrams and connections before soldering. Use proper insulation to prevent short circuits and ground loops. Label wires as you go to maintain clarity. Avoid over-tightening pots and switches, which can damage threads. Test each connection incrementally to catch errors early. Patience and attention to detail are key to avoiding mistakes that could lead to faulty electronics or safety hazards.
Mastery of guitar pickup wiring empowers you to customize your tone and unlock your instrument’s full potential. Use this guide as a foundation and continue exploring.
10.1 Summary of Key Concepts
Mastery of guitar pickup wiring involves understanding pickups, wiring basics, and soldering techniques. Proper tools and materials are essential for achieving reliable connections and optimal tone. Key concepts include knowing pickup types, reading diagrams, and following safety guidelines. The process demands patience and precision to ensure functionality and sound quality. Customization options, like coil splitting or phase switching, allow for tailored tones. Troubleshooting and proper grounding are critical for resolving issues. Practice and experimentation will enhance your skills and unlock your guitar’s full potential.
10.2 Encouragement for Further Exploration
Now that you’ve completed this guide, we encourage you to explore further and experiment with custom wiring configurations. Discover new tones by trying coil splitting or phase switching. Dive deeper into active pickups and advanced modifications. Use online forums and wiring manuals to learn from experienced players and technicians. Remember, guitar wiring is an art that rewards creativity and patience. Keep experimenting, share your projects, and continue refining your skills to unlock your guitar’s full sonic potential.
Be First to Comment