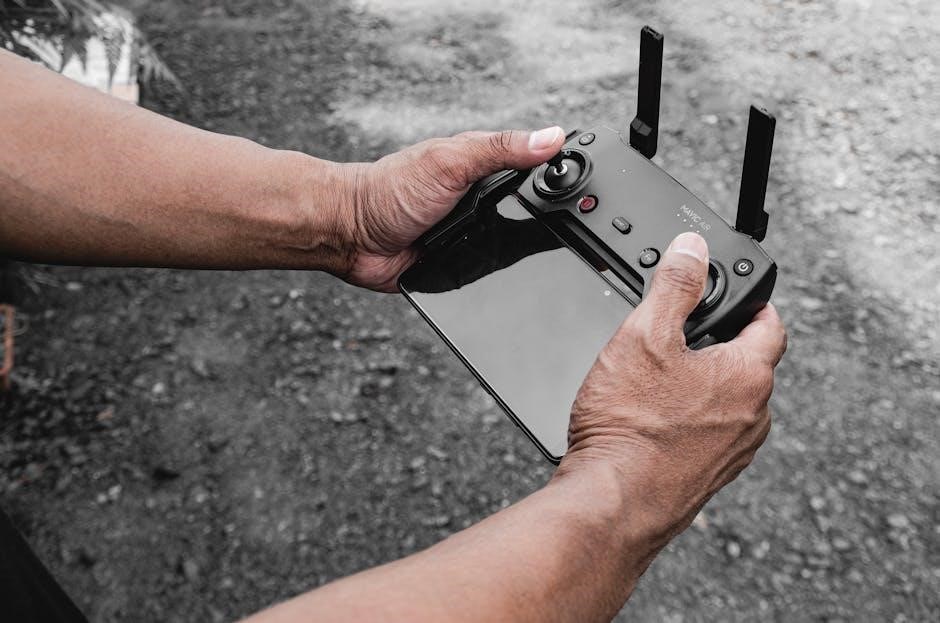
A solar charge controller regulates the flow of energy between solar panels and batteries, ensuring efficient charging. It acts as a vital switch, preventing overcharge and managing power. Available in MPPT and PWM types, it optimizes energy harvest and protects system components.
1.1 What is a Solar Charge Controller?
A solar charge controller is a critical component in solar power systems, regulating energy flow between solar panels, batteries, and loads. It ensures safe and efficient charging by preventing overcharging, which can damage batteries. The controller acts as an on/off switch, allowing power to flow when needed and cutting it off when the battery is full. Available in MPPT (Maximum Power Point Tracking) and PWM (Pulse Width Modulation) types, it optimizes energy harvest and protects against overvoltage, short circuits, and reverse polarity. Proper installation ensures system longevity and reliability.
1.2 Types of Solar Charge Controllers (MPPT vs. PWM)
Solar charge controllers are primarily available in two types: MPPT (Maximum Power Point Tracking) and PWM (Pulse Width Modulation). MPPT controllers are more advanced, optimizing energy harvest by converting excess voltage into higher current, ideal for larger systems or varying conditions. PWM controllers are simpler and cost-effective, suitable for smaller systems, but less efficient. MPPT controllers offer better performance in low-light conditions and with higher voltage panels, while PWM controllers are straightforward and reliable for basic setups. Understanding these types helps in selecting the right controller for specific solar power needs.
1.3 Importance of a Solar Charge Controller in a Solar System
A solar charge controller is essential for managing energy flow from solar panels to the battery, ensuring efficient charging and preventing overcharging. By regulating voltage and current, it protects the battery from damage and prolongs its lifespan. Additionally, it safeguards the system against short circuits, overvoltage, and other potential issues. This crucial component ensures that energy is stored safely and optimally, making it indispensable for maintaining the health and efficiency of the entire solar power system. Proper functioning ensures reliable power supply and maximizes the system’s performance and longevity.
Safety Precautions and Instructions
Always wear protective gear and ensure the system is disconnected before handling. Avoid overvoltage and short circuits to prevent damage or electrical hazards. Proper grounding is essential for safety.
2.1 General Safety Guidelines
Always wear protective gear, including gloves and safety glasses, when handling electrical components. Ensure the system is disconnected from power sources before maintenance. Avoid working on a live system, as it poses severe electrical shock risks. Keep the area well-ventilated to prevent hydrogen gas buildup from batteries. Use tools rated for the task to avoid damage or injury. Never attempt homemade repairs, as this can compromise safety and system performance. Follow all local electrical codes and regulations. Keep children and unauthorized individuals away from the system to prevent accidents.
2.2 Voltage and Current Considerations
Understanding system voltage and current is critical for safe operation. Ensure the charge controller matches your solar array’s voltage (12V, 24V, or 48V) to prevent damage. Always verify the maximum current rating of the controller and ensure it aligns with your solar panel’s output. Overvoltage protection is essential; check that the controller can handle the system’s maximum voltage. Regularly monitor voltage levels to avoid overcharging or undercharging the battery. Use a multimeter to measure voltage and current accurately. Refer to the manual for specific voltage and current limits, and always follow safety guidelines to minimize risks.
2.3 Compliance with Standards and Regulations
Ensure your solar charge controller complies with international and local electrical standards, such as IEC or UL certifications. Verify that the device meets safety and performance requirements for your region. Compliance ensures reliable operation and adherence to safety protocols. Familiarize yourself with regulations regarding renewable energy systems in your area. Always follow installation guidelines to meet electromagnetic compatibility standards. Check for certifications like CE or ETL, which indicate adherence to safety and environmental regulations. Compliance guarantees optimal performance and minimizes risks of system failure or legal issues.

Installation and Setup
Install the solar charge controller by mounting it securely, connecting the solar panels and battery correctly, and configuring settings for optimal performance. Ensure all connections are safe and meet system requirements for efficient energy management.
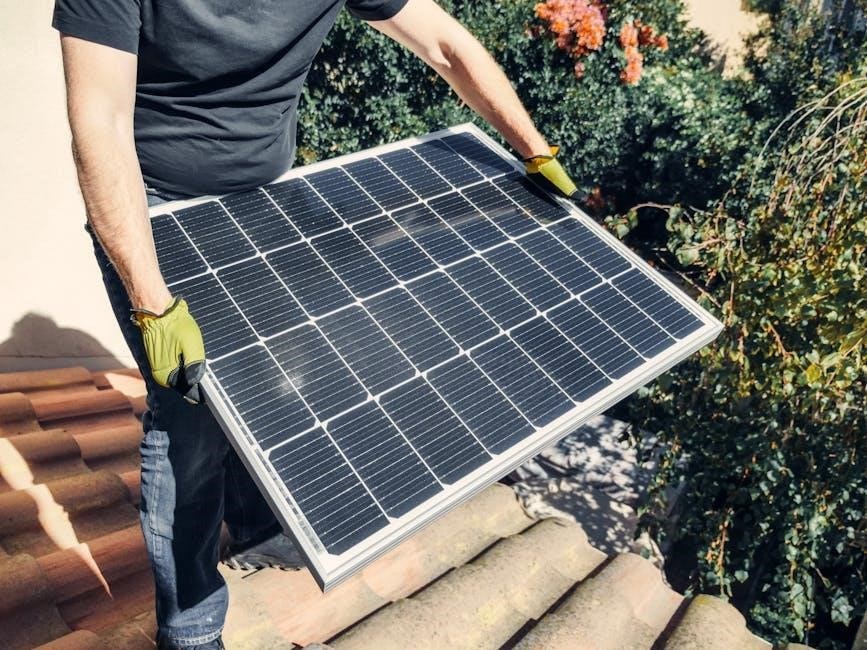
3.1 Preparing the Solar Panel System
Before installation, ensure the solar panel system is ready for connection. Inspect panels for damage, clean them to maximize efficiency, and verify voltage and current ratings. Check the system’s compatibility with the charge controller’s specifications. Secure all mounting hardware and ensure proper alignment for optimal sunlight exposure. Disconnect any existing power sources to prevent electrical hazards. Use protective gear and follow safety guidelines to avoid accidents. Ensure all components, including connectors and wires, are in good condition and appropriately sized for the system’s power requirements. Proper preparation ensures safe and efficient operation of the solar charge controller.
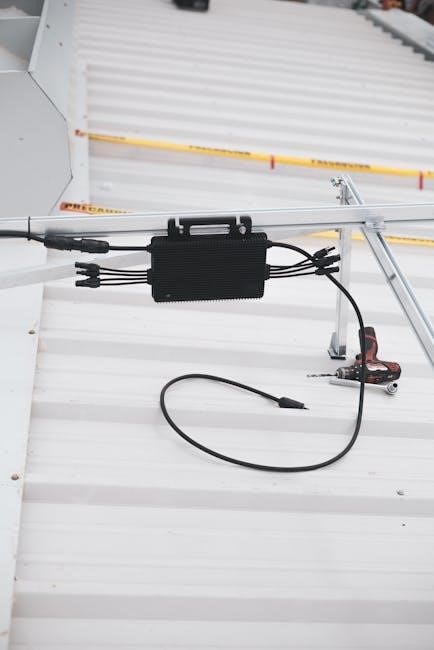
3.2 Connecting the Solar Panels to the Charge Controller
To connect the solar panels to the charge controller, ensure the system is turned off and all power sources are disconnected. Use the positive and negative terminals on the charge controller, matching the polarity of the solar panel connections. Securely tighten all terminals to prevent loose connections. Verify the voltage and current ratings of the panels align with the controller’s input specifications. Double-check all wires for proper insulation and sizing. Use protective gear to avoid electrical shock. Properly routing the cables will ensure safe and efficient energy transfer from the panels to the charge controller.

3.3 Connecting the Battery to the Charge Controller
Connect the battery to the charge controller by matching the positive and negative terminals. Ensure the battery voltage matches the controller’s rated voltage (12V, 24V, or 48V). Disconnect the solar panels before connecting the battery to avoid power surges. Use appropriately sized cables and tighten all connections securely. Wear protective gear like gloves and safety glasses. Double-check polarity to prevent short circuits. Once connected, verify the battery’s state of charge and ensure all terminals are tight. Refer to the battery and controller manuals for specific compatibility and safety guidelines to ensure proper installation and functionality.
3.4 Final Testing and Commissioning
After connecting all components, perform a final test to ensure proper functionality. Turn on the charge controller and monitor the LCD display for real-time data. Check battery voltage, charge current, and system status. Verify that the solar panels are charging the battery and that the controller is regulating the voltage and current effectively. Ensure all indicators (e.g., LED lights) are functioning correctly. Test the system under varying conditions, such as sunlight and darkness, to confirm proper operation. Review the manual for specific testing procedures and ensure all safety protocols are followed. This step confirms the system is ready for long-term use.

Features and Functions
A solar charge controller offers advanced features like MPPT technology, LCD monitoring, and multi-stage charging. It ensures efficient energy management, overcharge protection, and real-time system insights.
4.1 LCD Display and Monitoring Capabilities
The LCD display on a solar charge controller provides real-time monitoring of system performance, including voltage, current, and temperature. It shows the charging status, battery level, and power output. Users can track historical data, such as daily energy production and system faults. The display also offers customizable settings and alerts for overcharge, overload, or short circuits. Advanced models support Bluetooth or Wi-Fi connectivity for remote monitoring via smartphones or computers. This feature enhances user experience by enabling seamless system oversight and data analysis, ensuring optimal performance and troubleshooting capabilities. Regularly checking the display helps maintain system health and efficiency.
4.2 Maximum Power Point Tracking (MPPT) Technology
Maximum Power Point Tracking (MPPT) technology optimizes energy harvest from solar panels by adjusting the system voltage to match the optimal operating point; This advanced feature ensures maximum energy transfer to the battery, improving overall system efficiency by 10-30%. MPPT controllers continuously monitor and adjust the voltage, maximizing power output even in varying weather conditions. By minimizing energy loss and ensuring efficient charging, MPPT technology is essential for larger solar systems. It provides a reliable and high-performance solution, making it a critical component for maximizing solar energy utilization and ensuring long-term system reliability.
4.3 Protection Mechanisms (Overcharge, Short Circuit, etc.)
Solar charge controllers include essential protection mechanisms to safeguard your system from potential hazards. Overcharge protection prevents batteries from excessive voltage levels, ensuring longevity. Short circuit protection detects and interrupts faulty connections, avoiding damage. Reverse polarity protection stops current flow if connections are incorrect. Overvoltage and undervoltage protections maintain stable output, while thermal protection shuts down the controller if temperatures rise dangerously. These mechanisms ensure safe operation, preventing system damage and extending component lifespan. They are critical for maintaining reliability and safety in solar energy systems, providing peace of mind for users.

Choosing the Right Solar Charge Controller
Selecting the ideal solar charge controller requires evaluating system size, voltage, and type. Ensure compatibility with your solar panels and battery to optimize performance and efficiency.
5.1 Understanding System Voltage (12V, 24V, 48V)
System voltage is critical when selecting a solar charge controller. Common voltages include 12V, 24V, and 48V, which must align with your battery bank and solar panels. A 12V system is ideal for small applications, while 24V and 48V systems are better for larger setups due to lower current requirements and reduced energy loss. Always match the charge controller’s voltage rating to your system’s voltage to ensure compatibility, efficiency, and safety. Mismatched voltages can lead to poor performance or damage to components.
5.2 Sizing the Charge Controller for Your Solar Panel Array
Sizing the charge controller correctly ensures optimal performance and safety. Calculate the total power output of your solar panel array in watts (W) and volts (V). Divide the total watts by the system voltage to determine the required current rating. Add a 10-20% safety margin to account for surges and inefficiencies. Ensure the controller’s maximum power point tracking (MPPT) capacity matches or exceeds your array’s power output. Proper sizing prevents overheating and ensures efficient energy transfer from panels to the battery bank, maximizing your solar system’s reliability and longevity.
5.3 Using Manufacturer Sizing Tools and Guidelines
Manufacturers often provide sizing tools and guidelines to help select the right charge controller for your solar panel array. These tools typically include calculators or charts that require inputs like solar array size, voltage, and battery type. By following these guidelines, you ensure compatibility and optimal performance. Always refer to the manufacturer’s specifications to confirm the charge controller’s capacity and features align with your system’s requirements. Proper sizing enhances efficiency, prevents damage, and ensures long-term reliability, making it a critical step in system design and installation.
Troubleshooting Common Issues
Troubleshooting common issues ensures optimal performance; Check error codes, verify connections, and review the manual for solutions. Regular checks prevent system malfunctions and ensure reliability.

6.1 Identifying and Diagnosing Faults
Identifying faults in a solar charge controller involves monitoring system performance and checking for error codes or LED indicators. Start by reviewing the manual to understand specific fault signals. Inspect connections for loose wires or corrosion, as these are common causes of malfunctions. Use a multimeter to measure voltages and ensure they match specified ranges. Check the display for error messages, which often point to overcharging, short circuits, or temperature issues. Log system behavior over time to pinpoint intermittent problems. Regularly update firmware and consult troubleshooting guides for advanced diagnostics.
6.2 Solving Connectivity and Voltage Problems
Connectivity issues often arise from loose or corroded connections. Verify all wires are securely attached to the controller, battery, and panels. Check for corrosion and clean terminals if necessary. Voltage problems may stem from mismatched system components or incorrect settings. Use a multimeter to verify voltage levels at the battery and panel inputs. Ensure the controller is configured for the correct system voltage (12V, 24V, or 48V). If voltage readings are unstable, inspect the panel array for shading or damage. Reset the controller or refer to the manual for voltage calibration procedures. Ensure compatibility between components to avoid conflicts.
6.3 Resetting and Reconfiguring the Controller
Resetting the controller can resolve software-related issues. Press and hold the reset button for 5-10 seconds to restore factory settings. After resetting, reconfigure basic settings like system voltage (12V, 24V, 48V), charging parameters, and load settings. Use the LCD display or manufacturer-provided software for precise adjustments. Ensure all settings align with your solar panel and battery specifications. Save changes and test the system to confirm proper operation. Refer to the manual for detailed reset and reconfiguration procedures. Regularly backing up settings can prevent data loss during resets.

Maintenance and Optimization
Regular maintenance ensures optimal performance of your solar charge controller. Clean the unit, check connections, update software, monitor performance. Refer to the manual for guidelines.
7.1 Regular Checks and Updates
Conduct regular checks to ensure your solar charge controller operates efficiently. Verify the LCD display for error codes and update firmware as needed. Inspect connections for tightness and wear. Monitor battery voltage and charge current to ensure proper function. Check system performance metrics and review event logs. Schedule annual professional inspections for advanced diagnostics. Always refer to the user manual for specific guidelines on updates and maintenance procedures. Regular updates ensure compatibility and optimal performance, extending the lifespan of your solar charge controller.
7.2 Cleaning and Environmental Considerations
Regular cleaning is essential to maintain the efficiency of your solar charge controller. Dust and debris can accumulate and impair heat dissipation, so gently wipe the unit with a soft cloth. Avoid using harsh chemicals or abrasive materials that may damage the surface. Ensure the controller is installed in a well-ventilated, dry area to prevent moisture buildup. Protect it from extreme temperatures and direct sunlight to maintain optimal performance. Environmental considerations include proper disposal of old controllers and adhering to local recycling regulations. Regular maintenance ensures durability and efficiency while minimizing environmental impact.
7.3 Upgrading or Replacing the Charge Controller
Upgrading or replacing your solar charge controller may be necessary to enhance performance, improve compatibility, or address system expansion. Ensure the new controller matches your system’s voltage (12V, 24V, or 48V) and power requirements. Before replacing, disconnect the battery and solar panels to avoid electrical hazards. Install the new controller by following the manufacturer’s instructions, ensuring all connections are secure. Test the system thoroughly after installation to confirm proper functionality. Dispose of the old controller responsibly, adhering to environmental regulations for electronic waste. Regular upgrades can optimize your solar system’s efficiency and reliability over time.
A solar charge controller is essential for optimizing energy harvest and ensuring system longevity. Proper installation, maintenance, and adherence to guidelines guarantee reliable performance and safety over time.
8.1 Summary of Key Points
8.2 Best Practices for Long-Term Use
For long-term efficiency and durability, regularly inspect connections and settings to ensure optimal performance. Clean the controller to prevent dust buildup and maintain proper airflow. Monitor temperature and humidity levels to avoid damage. Keep the unit in a shaded, well-ventilated area. Update firmware periodically to access new features and improvements. Check battery voltage and charging parameters regularly to prevent overcharging or undercharging. Always follow the manufacturer’s guidelines for maintenance and troubleshooting. By adhering to these practices, you can ensure reliable operation and extend the lifespan of your solar charge controller.
8.3 Resources for Further Reading and Support
For additional guidance, refer to the manufacturer’s official solar charge controller user manual PDF. Visit the company’s website for detailed installation guides, troubleshooting tips, and firmware updates. Online forums and renewable energy communities provide peer-to-peer advice and real-world experiences. YouTube tutorials and technical blogs offer visual and step-by-step instructions. Contact customer support for personalized assistance with specific models or issues. Lastly, consult local solar energy organizations for region-specific recommendations and compliance standards. These resources ensure comprehensive understanding and effective use of your solar charge controller.
Be First to Comment